• Home
  • Suggest A DIY
  • DIY Newsletter

Quilting

Patterns, patchworks and projects

  • About CraftGossip
  • Our Network
    • Bath & Body Crafts
    • Candle Making Ideas
    • Crochet Ideas
    • Cross Stitch
    • Edible Crafts
    • Felting Patterns
    • Glass Art
    • Home & Garden Ideas
    • Indie Crafts
    • Jewelry Making
    • Kids Crafts
    • Knitting Patterns
    • Lesson Plans
    • Needlework
    • Party Ideas
    • Polymer Clay
    • Quilting Ideas
    • Recycled Crafts
    • Scrapbooking
    • Sewing Patterns
    • Card Making
    • DIY Weddings
    • Not Craft Ideas
  • Giveaways
  • Roundups
  • Store
  • Search

Sustainable Sewing: Stitching for a Greener Future

June 28, 2024 by Shellie Wilson

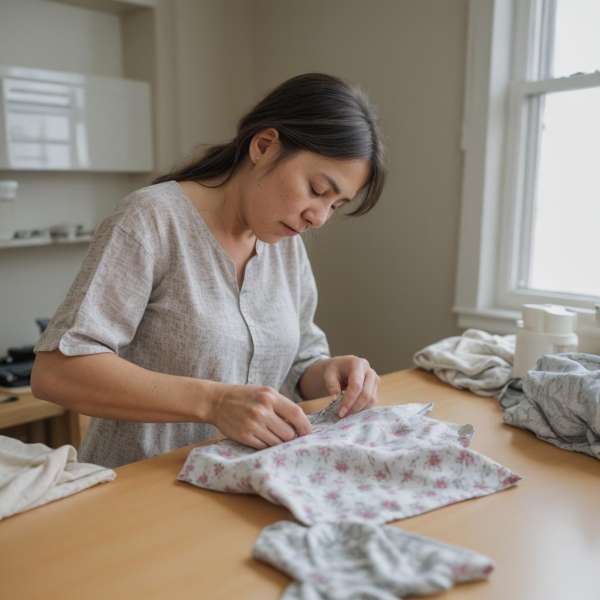
In recent years, there has been a growing awareness of the environmental impact of the fashion and textile industries. As a result, many people are turning to sustainable alternatives, including sustainable sewing. Sustainable sewing encompasses various practices aimed at reducing waste, conserving resources, and promoting ethical production methods. From choosing eco-friendly materials to repurposing old garments, sustainable sewing offers a pathway to a greener and more responsible approach to crafting. In this article, we’ll explore the principles of sustainable sewing and how you can incorporate them into your sewing projects.

Choosing Eco-Friendly Materials

One of the key aspects of sustainable sewing is selecting materials that are environmentally friendly. Opt for fabrics made from organic cotton, hemp, bamboo, or Tencel, which are produced using fewer chemicals and pesticides compared to conventional cotton. Additionally, consider using recycled fabrics, such as reclaimed denim or repurposed bed sheets, to give new life to old textiles and reduce waste.

Minimizing Waste

Another essential aspect of sustainable sewing is minimizing waste. Make the most of your fabric by carefully planning your projects and cutting patterns efficiently to reduce leftover scraps. Save smaller fabric remnants for future projects or incorporate them into patchwork designs. Additionally, consider alternative packaging options, such as reusable fabric bags or biodegradable packaging materials, to minimize waste in your sewing practice.

Ethical Production Practices

In addition to environmental considerations, sustainable sewing also emphasizes ethical production practices. Choose fabrics and supplies from companies that prioritize fair labor practices and transparent supply chains. Support local artisans and small businesses whenever possible, and consider making your own garments rather than purchasing mass-produced items from fast fashion brands.

Repurposing and Upcycling

One of the most creative aspects of sustainable sewing is repurposing and upcycling old garments and textiles. Instead of throwing away worn-out clothing, transform them into something new and stylish. Turn old jeans into a denim tote bag, repurpose a vintage tablecloth into a summer dress, or patch up worn areas on clothing with decorative stitching. Upcycling not only reduces waste but also adds a unique touch to your handmade creations.

Sustainable sewing is more than just a trend—it’s a mindset that promotes mindful consumption, environmental stewardship, and creative expression. By choosing eco-friendly materials, minimizing waste, supporting ethical production practices, and embracing the art of repurposing and upcycling, you can make a positive impact on the planet while indulging in your passion for sewing. So grab your needles and thread, and join the movement toward a more sustainable and eco-conscious approach to crafting.

Let’s sew our way to a greener future—one stitch at a time.
«
»

Have you read?

Marking Tools That Won’t Bleed or Ghost on Fabric (A Hobby Quilter’s Guide)

If you’ve ever finished quilting a beautiful project… only to find faint blue lines still staring back at you…

You know the panic.

Marking tools are one of those quilting notions we don’t think much about — until something doesn’t wash out.

And unfortunately, not all marking tools are created equal.

Some disappear perfectly.
Some fade too fast.
And some leave ghost lines that refuse to budge.

Let’s talk about how to choose the right marking tools — so your quilt is remembered for the stitching, not the stains.

Why Marking Tools Matter More Than You Think

Marking tools guide:

  • Straight quilting lines

  • Free-motion designs

  • Appliqué placement

  • Foundation paper piecing

  • Border alignment

Without them, accuracy suffers.

But using the wrong one can permanently affect your quilt top — especially on light fabrics.

For hobby quilters who invest hours into a project, safe marking choices matter.

The Most Common Types of Quilting Marking Tools

Here’s a simple breakdown of the main options and when they work best.

Water-Soluble Fabric Markers

These are among the most popular marking tools for quilting.

They:

  • Write clearly

  • Wash out with water

  • Work well on light fabrics

Best for:

  • Straight line quilting

  • Temporary placement marks

  • Detailed designs

Important tip:
Always test on a scrap of the same fabric first. Some fabrics hold pigment longer than others.

Air-Erasable Pens

These fade naturally over time.

They’re great for:

  • Short-term marking

  • Quick projects

  • Small quilting sections

The downside?
They can disappear before you’re finished — especially in warm climates.

They’re not ideal for large quilts that take several days to quilt.

Chalk Pencils & Chalk Wheels

Chalk is gentle and visible, especially on darker fabrics.

It:

  • Brushes away easily

  • Doesn’t penetrate fibres deeply

  • Works well for hand quilting layouts

Chalk wheels offer fine lines for precision marking.

Be sure to brush or rinse fully before pressing, as heat can set some chalks.

Hera Markers (No Ink at All)

Hera markers are underrated.

They:

  • Create a crease line rather than pigment

  • Leave no residue

  • Are ideal for straight-line quilting

They work beautifully on lighter fabrics and are perfect for quilters nervous about ink.

If you’ve ever worried about ghost marks, this tool feels very reassuring.

Heat-Erasable Pens

These disappear when pressed with an iron.

They’re popular for:

  • Detailed quilting designs

  • Visible but temporary lines

However, caution is important.

In very cold temperatures, marks can reappear. They usually fade again with warmth, but it can be unsettling if you’re not expecting it.

What Causes Marking Lines to “Ghost”?

Ghosting happens when:

  • Ink bonds with fabric fibres

  • Fabric sizing reacts with pigment

  • Marks are pressed before removal

  • The wrong tool is used for that fabric type

Light-coloured quilting cotton is usually forgiving.
Dark or heavily dyed fabrics need extra caution.

Always test first.

Even experienced hobby quilters do this.

The Safest Approach for Hobby Quilters

If you want to minimise risk:

For light fabrics:
Use water-soluble pens or hera markers.

For dark fabrics:
Use chalk pencils or chalk wheels.

For long-term projects:
Avoid air-erasable pens unless working in small sections.

And most importantly — remove markings before applying high heat.

Marking for Different Techniques

Straight-line quilting:
Hera markers or water-soluble pens.

Free-motion quilting:
Chalk pencils or fine water-soluble pens.

Appliqué placement:
Light water-soluble markers.

Foundation paper piecing:
Usually no marking needed, but chalk can help with alignment.

Different tools suit different stages — you don’t need every type.

When to Replace Your Marking Tools

If your marker:

  • Skips or scratches

  • Leaves inconsistent lines

  • Doesn’t erase fully

  • Has dried out

It’s time to replace it.

Marking tools are inexpensive compared to the cost of fabric and time invested in a quilt.

Reliable quilting retailers like Fat Quarter Shop carry a range of water-soluble pens, chalk wheels, and specialty markers designed specifically for quilting cotton, which helps reduce the risk of staining.

Common Marking Mistakes to Avoid

  • Pressing before removing marks

  • Using regular office pens (please don’t)

  • Skipping the scrap test

  • Leaving marks for weeks before washing

Even experienced quilters have learned these lessons the hard way.

The Bottom Line

Marking tools are meant to guide your quilting — not haunt it.

Choose tools based on:

  • Fabric colour

  • Project timeline

  • Quilting style

  • Your comfort level

If you’re unsure, start with a water-soluble pen and always test first.

A few seconds of testing can save hours of frustration.

This article is part of our Ultimate Guide to Quilting Notions for Hobby Quilters, where we simplify essential tools without overwhelming you.

Next in the series:
Pressing Tools That Make Quilts Look Professional


Categories

Christmas quilts Craft Competitions Craft News and Events Free Quilt Patterns Modern More Quilting Patterns & Projects Quilting Art Quilts Quilting Blocks Quilting Books Quilting Contest Quilting Events Quilting Fabric Quilting Gift Ideas Quilting How To & Tutorials Quilting Inspiration Quilting Products Quilting Technique Scrap Fabric Tutorials and Patterns

RSS More Articles

  • Digital Scrapbooking Is Back: 12 Apps for Creating Scrapbook Pages on Your iPad
  • Learn about Your Local Birds
  • Knit Yourself Some Pockets
  • Marking Tools That Won’t Bleed or Ghost on Fabric (A Hobby Quilter’s Guide)
  • Free Crochet Pattern – Wind Spinner
  • How To Make Granola: 10 Easy Homemade Granola Recipes
  • 15 Handmade Halloween Mantel Decorations To Make This Year
  • 12 Scrapbook Layout Ideas with a Single Photo
  • Wet Felted Scarf Tutorial by Natasha Smart Textiles
  • How To Sew a Throw Pillow

Copyright © 2026 · CraftGossip | Start Here | Contact Us | Link to Us | Your Editors | Privacy and affiliate policy