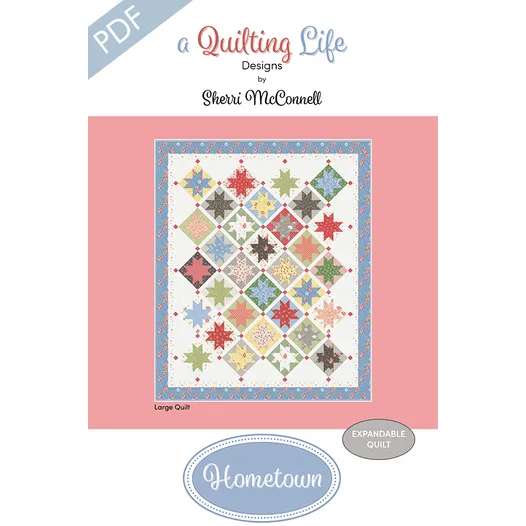
Create aDownloadable PDF Hometown Quilt Pattern by stitching Emma by Sherri & Chelsi for Moda Fabrics layers. A layer cake in Emma by Sherri & Chelsi for Moda Fabrics can be used to stitch a little bit of nostalgia into this comforting project.
Patterns, patchworks and projects
Create aDownloadable PDF Hometown Quilt Pattern by stitching Emma by Sherri & Chelsi for Moda Fabrics layers. A layer cake in Emma by Sherri & Chelsi for Moda Fabrics can be used to stitch a little bit of nostalgia into this comforting project.
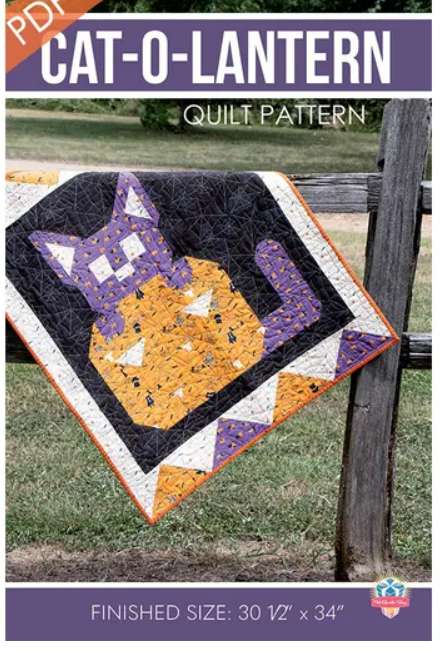
Some Halloween quilt patterns make me want to decorate the whole house. Others make me want to quietly add another project to the sewing pile and pretend it was always part of the plan. The Cat-O-Lantern quilt pattern from Fat Quarter Shop falls very comfortably into that second category.
A kitty hugging a jack-o’-lantern? That is a fairly effective way to get my attention. It brings together two Halloween favourites in a design that feels cheerful and playful, with plenty of appeal for anyone who prefers their seasonal decorating cute rather than creepy.
If you’re looking for a small Halloween quilt pattern for a cat lover, this one is worth a closer look. My review is based on the published design and product details; I haven’t sewn the pattern myself.
Cat-O-Lantern is a downloadable PDF quilt pattern exclusive to Fat Quarter Shop. The finished quilt measures 30½ × 34 inches, and the PDF contains 11 pages.
Fat Quarter Shop lists the difficulty as beginner. Its description calls for four fat quarters plus binding, but check the full pattern requirements before shopping so you can also plan for backing, batting and any additional supplies.
This is a paid digital pattern, so you’re purchasing the instructions rather than a finished quilt or fabric kit.
The biggest attraction for me is the combination of a recognisable seasonal theme and a little personality. A pumpkin quilt is lovely, but adding a cat gives the project a playful focal point.
It also offers a nice alternative to Halloween sewing projects covered in elaborate motifs. Sometimes one strong design is all a room needs, especially when the shelves already contain enough pumpkins to suggest you’ve started a small farm.
The finished size is another selling point. I would think of Cat-O-Lantern primarily as a Halloween wall quilt or decorative accent quilt. At 30½ × 34 inches, it is compact enough to plan a display around, although I would measure the intended space before buying.
We’ve previously included it in our collection of lap blanket quilt patterns, but do pay attention to those dimensions if you’re hoping for generous sofa coverage.
The retailer’s beginner rating is encouraging, particularly if you want a seasonal project without committing to a large quilt.
However, I haven’t reviewed the purchased instructions, so I can’t assess the cutting directions, construction steps or how much guidance they provide for a first-time quilter.
My practical advice is to read the entire PDF before cutting. Label your pieces, keep the fabrics organised and take your time with seam allowances. Those habits are helpful on any quilt, and they’re especially useful when the finished design depends on shapes landing where they should.
If you’d like another feline project to compare, our free Halloween cats table runner feature is another place to find seasonal sewing inspiration.
For my version, I’d start by thinking about contrast. Choose fabrics that let the cat and pumpkin stand out clearly from their surroundings, rather than selecting every favourite Halloween print and hoping they all get along.
Small prints, solids and subtle tonal fabrics would be my starting point. A busy novelty print can be wonderful, but it may compete with the main design when used in the wrong spot.
Before cutting, lay your proposed fabrics together and take a photograph. Look at it as a small thumbnail. If everything blends into one patch of colour, you may need a lighter or darker fabric to give the design definition.
And if choosing the pumpkin fabric sends you down an autumn sewing rabbit hole, our scrap fabric pumpkin quilt block and table runner feature has another project to add to the list.
I’d put Cat-O-Lantern on the shortlist for quilters who enjoy cute Halloween décor, cat-themed projects and smaller quilts made for display.
It could also make a thoughtful handmade gift for someone who brings out their Halloween decorations at the first possible opportunity. You know the person. Their pumpkins appear before the supermarket has finished clearing the previous holiday.
The main limitation is the size if you want a substantial throw. For a seasonal wall display, though, that smaller footprint is part of the appeal.
On design appeal, yes. Cat-O-Lantern has a charming theme, a compact finished size and a beginner rating that makes it worth investigating for a manageable Halloween project.
I would still read the full instructions before deciding how quickly it might come together. A cute cover is an invitation to sew, but it isn’t a promise of an afternoon finish.
You can find the Cat-O-Lantern PDF quilt pattern at Fat Quarter Shop. If your Halloween decorating style involves friendly pumpkins, handmade touches and a cat who probably thinks the sewing table belongs to them, this little quilt could fit right in.