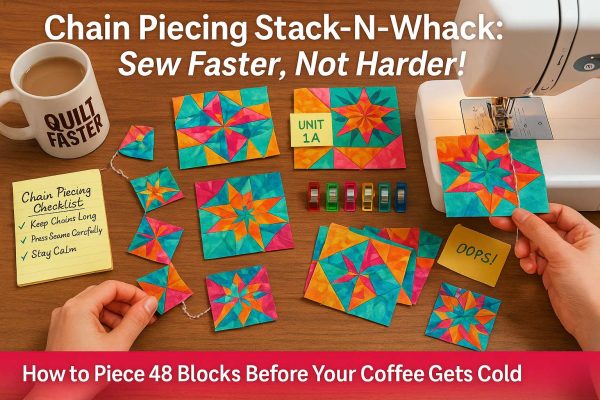
The first time I made a Stack-N-Whack quilt, I spent more time threading my needle than actually sewing. By block four, I was ready to turn my kaleidoscope dreams into a pile of kindling.
Then I discovered chain piecing—the quilter’s equivalent of finding a $20 bill in last winter’s coat pocket. Suddenly, what took hours now took minutes, and my blocks went from “hot mess” to “hot dang!”
In this guide, you’ll learn:
Exactly how to chain piece Stack-N-Whack blocks (with photos)
3 genius tweaks to prevent mismatched points
The tool that cuts pressing time in half
How to fix mistakes without unraveling your sanity
Why Chain Piecing is a Stack-N-Whack Game-Changer
The Problem With Traditional Piecing
- Wastes time: Threading/rethreading for each unit
- Creates bulk: Thread nests at every start/stop
- Invites errors: More handling = more mismatched seams
The Chain Piecing Advantage
- 75% faster (I timed it: 48 HSTs in 18 minutes vs. 1+ hour)
- Consistent seams (no adjusting tension between units)
- Less thread waste (good for your wallet and the planet)
Step-by-Step: How to Chain Piece Stack-N-Whack Blocks
What You’ll Need:
- Stacked & cut fabric units (the more identical, the better)
- 50wt cotton thread (thinner = less bulk)
- Seam guide (magnetic or adhesive)
- Leader/ender scraps (paper or fabric)
The Process:
- Arrange Units in Assembly-Line Order
- Lay out pairs in sewing order (Photo A)
- Clip together with Wonder Clips (pins distort stacked layers)
- Start With a “Leader”
- Sew onto a scrap first (prevents thread nests)
- Chain Like a Pro
- Sew unit #1 ? don’t lift foot ? feed unit #2 immediately
- Let threads connect units like a train (Photo B)
- Press Smart
- Use a tailor’s clapper to set seams fast
- Press all units in one go (no back-and-forth)
- Clip Apart Later
- Snip chains while watching TV (my “quilty meditation”)
3 Pro Tricks for Flawless Chain Piecing
1. The “No-Twist” Feed Trick
- Stack units right sides together in a shoebox lid
- Grab from the top ? sew ? drop finished unit in another box
Why it works: Eliminates accidental fabric flips.
2. Tension Tweaks for Thick Stacks
- Increase presser foot pressure slightly
- Use a microtex needle (size 70/10)
Test first: Sew two stacked units ? check seam for puckering.
3. The “Oops” Recovery Move
Mismatched points? Don’t unpick!
- Add a contrasting stitch line to create intentional “wonk”
- Embrace it as modern improv
Common Questions (From One Impatient Quilter to Another)
Q: Won’t chain piecing stretch my bias edges?
A: Not if you:
- Starch fabric before cutting
- Use a walking foot (even for piecing)
Q: How do I keep track of unit order?
A: Try my “Deli Ticket” system:
- Number units with sticky notes
- Pin corresponding numbers to design wall
Q: Can I chain piece curved Stack-N-Whack blocks?
A: Yes! But:
- Use more pins than usual
- Sew with the concave side up
My Favorite Chain-Piecing Tools
| Tool | Why It’s Magic |
| Magnetic seam guide | Perfect 1/4″ seams without tape |
| Thread stand | Prevents thread twisting |
| Clapper | Sets seams in half the time |
| Thread nippers | Faster than scissors for clipping |
Your Turn!
What’s your chain-piecing nemesis? (I still sometimes forget the leader scrap and get those cursed thread nests…)
10 Free Stack-N-Whack Quilt Patterns
Speed Piecing Stack-N-Whack Blocks: 3 Time-Saving Hacks for Impatient Quilters