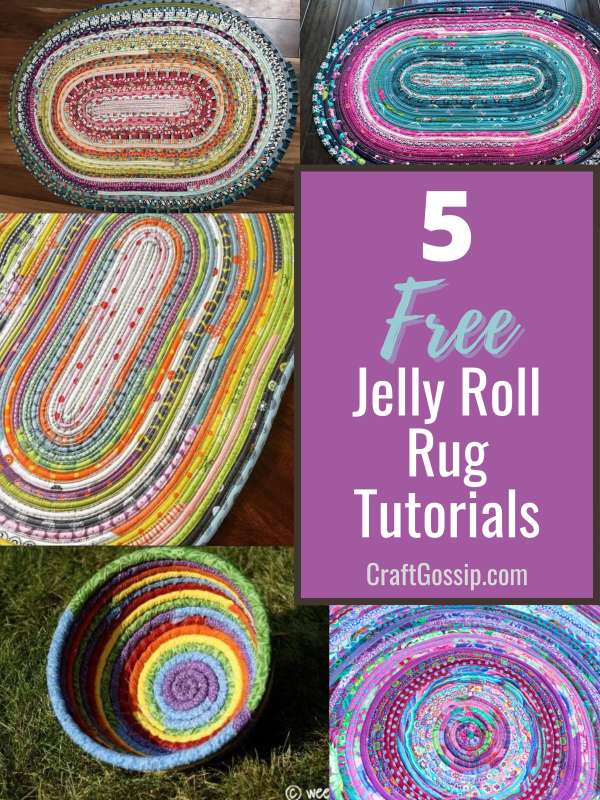
Jelly roll quilts are a popular and easy way to incorporate your favourite fabric into a useful and decorative project. The pre-cut strips are an economical way to get started and are ideal for quilters of all levels. From the seasoned pro to the beginner, there’s something for everyone. Not only are jelly roll quilts practical, but they also look amazing. With the variety of colours and patterns available, you can easily create a unique quilt that fits your style.
Making a jelly roll rug is an ideal project for using up those jelly rolls you have lying around. Rugs are in high demand right now and they are an excellent way to put your sewing skills to work while also giving your home a touch of your personal style. The pre-cut strips make it easy to get started, and the simple designs are perfect for new quilters.
Jelly roll rugs are also an excellent way to add a touch of colour to your home décor. Whether you are making one for your living room, kitchen, or bathroom, there’s a jelly roll quilt pattern that’s perfect for you. And the best part is, you can easily make a rug in your favourite colours and patterns to match your home décor.
Whether you are looking for a beginner-friendly project or something a little more challenging, there’s a jelly roll rug pattern that’s perfect for you. With five free tutorials to get you started, there’s no reason to wait. So why not try your hand at making a jelly roll rug today? Your home will thank you!
Look at the gorgeous fabrics Mister Domestic used in his tutorial: If you’re a fan of bright, bold, and eye-catching designs, then you’ll love the jelly roll rug tutorial by Mister Domestic. With a focus on the stunning fabrics he uses, this tutorial will show you step-by-step how to create a beautiful and unique jelly roll rug that will be the envy of all your quilting friends.
Create Whimsy has a detailed tutorial for making a jelly roll rug: With its comprehensive and easy-to-follow instructions, Create Whimsy’s tutorial is perfect for quilters of all levels. Whether you’re a seasoned quilter or just starting out, this tutorial will take you through the entire process of making a jelly roll rug, from selecting the right fabrics to finishing the final product.
Jenny of Missouri Star Quilt Company uses beautiful fabrics to make her round version: In this tutorial, Jenny from Missouri Star Quilt Company shares her secrets for making a round jelly roll rug that’s both beautiful and practical. With her expertise and attention to detail, she’ll show you how to choose the right fabrics and create a rug that will be a stunning addition to any room.
Sewing Scraps had a bright and fun version of the rug: If you’re looking for a fun and creative way to use up your fabric scraps, then look no further than the jelly roll rug tutorial from Sewing Scraps. With a focus on bright and playful fabrics, this tutorial will show you how to create a fun and whimsical rug that will bring a touch of personality to any room.
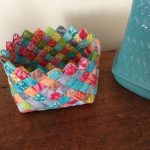
Change it up a bit and make a bowl instead. Wee Folk Art shows you how: If you’re looking for something a little different, then why not try making a jelly roll bowl instead of a rug? With its easy-to-follow instructions, Wee Folk Art’s tutorial will show you how to create a beautiful and functional bowl that will be a unique addition to your quilting collection.
Looking for Quilting supplies and Fabric? Check out Fat Quarter Shop
Can you make your own Jelly rolls? YES!
Making your own jelly rolls for quilting can be a fun and creative process. Here are the steps to create your own custom jelly rolls:
Choose your fabric: Choose a selection of fabrics that you love and that work well together. You can choose solid colors, prints, or a mix of both.
Cut the strips: Cut 2.5-inch strips of fabric, making sure to keep the strips straight and the edges even. You can use a rotary cutter, ruler, and cutting mat to make sure your cuts are precise.
Organize the strips: Arrange the strips in the order you want them, making sure to mix up the colors and prints. You can arrange them randomly or in a pattern.
Sew the strips: Sew the strips together end to end, creating one long strip. Make sure to use a ¼-inch seam allowance and to sew straight, keeping the edges aligned.
Press the seams: Once the strips are sewn together, press the seams open with an iron. This will help to keep the fabric flat and make it easier to sew the strips into a quilt.
Roll the fabric: Roll up the strip of fabric into a neat jelly roll, making sure to keep the edges even. You can use a piece of ribbon or string to keep the roll closed.
Store: Label your jelly roll with the fabric names and store it in a safe place until you are ready to use it.
By making your own jelly rolls, you have control over the colors, prints, and fabric types that you want to use in your quilts. Happy quilting!
Leave a Reply